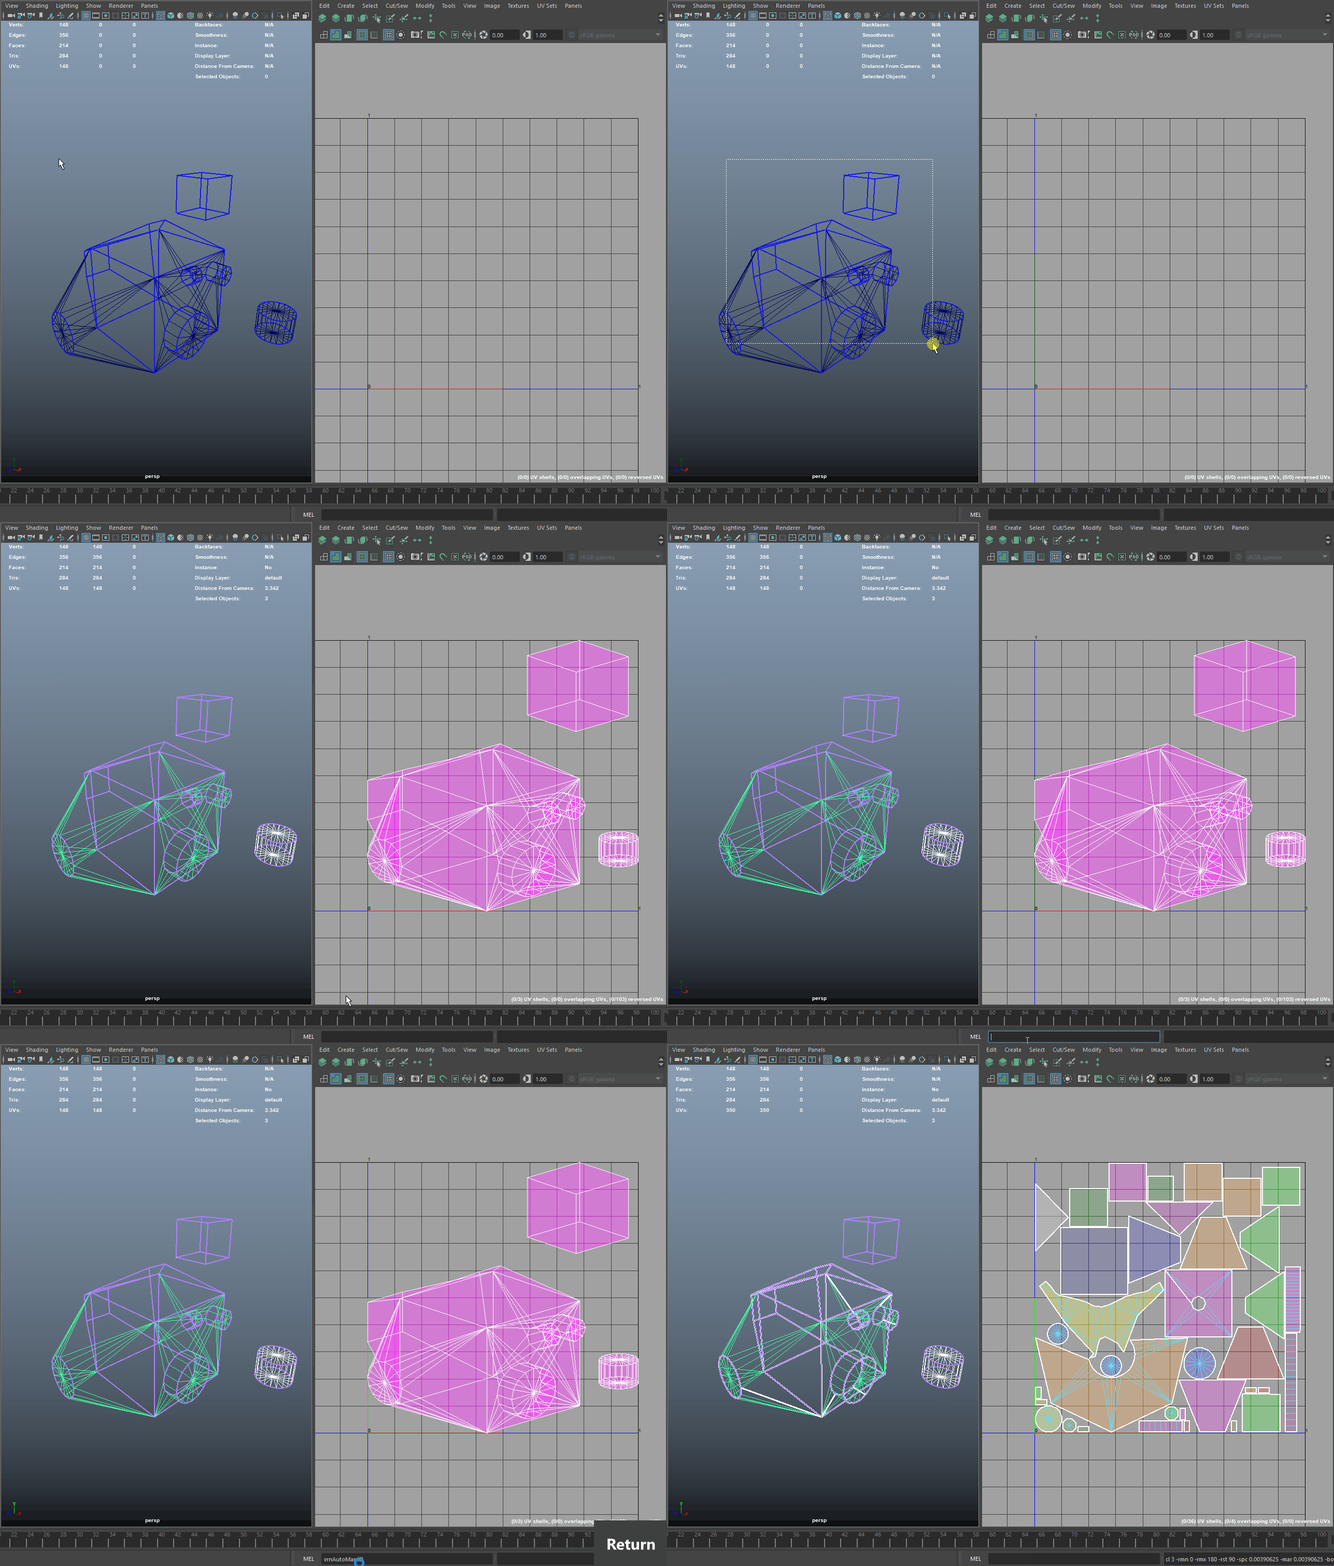
Here is a step by step tutorial on how to install and run my vrnAutoMap.mel script, which you can download for free from Gumroad:
https://gum.co/vrnAutoMap
In short, the script automatically creates oriented UVs for the selected meshes and a UV layout for all the objects in the current selection for a single texture sheet.
INSTALLATION:
1. Download the file from Gumroad, open the archive.
2. Copy "vrnAutoMap.mel" to My Documents/maya/<version>/scripts
Just replace <version> with your version of Maya. This was tested with 2017 and 2018, previous versions might lack some features and will probably not work.
3. If you plan on using this as a shelf button, feel free to copy the icon "vrnAutoMap.png" to My Documents/maya/<version>/prefs/icons
4'. Restart Maya
or
4". Type this in the Script Editor and press the numpad Enter button:
rehash
WHAT THE SCRIPT DOES:
1. Flattens the object with a Planar Projection on the current UV set.
2. All hard edges are converted to UV cuts.
3. Unfolds everything selected.
4. Orients all selected UV shells (Requires Maya 2017 Update 4 or newer)
5. Applies Layout UVs.
USAGE:
1. Select one or more meshes.
2. Type this command in the Script Editor and press the numpad Enter key:
vrnAutoMap(0,0,0);
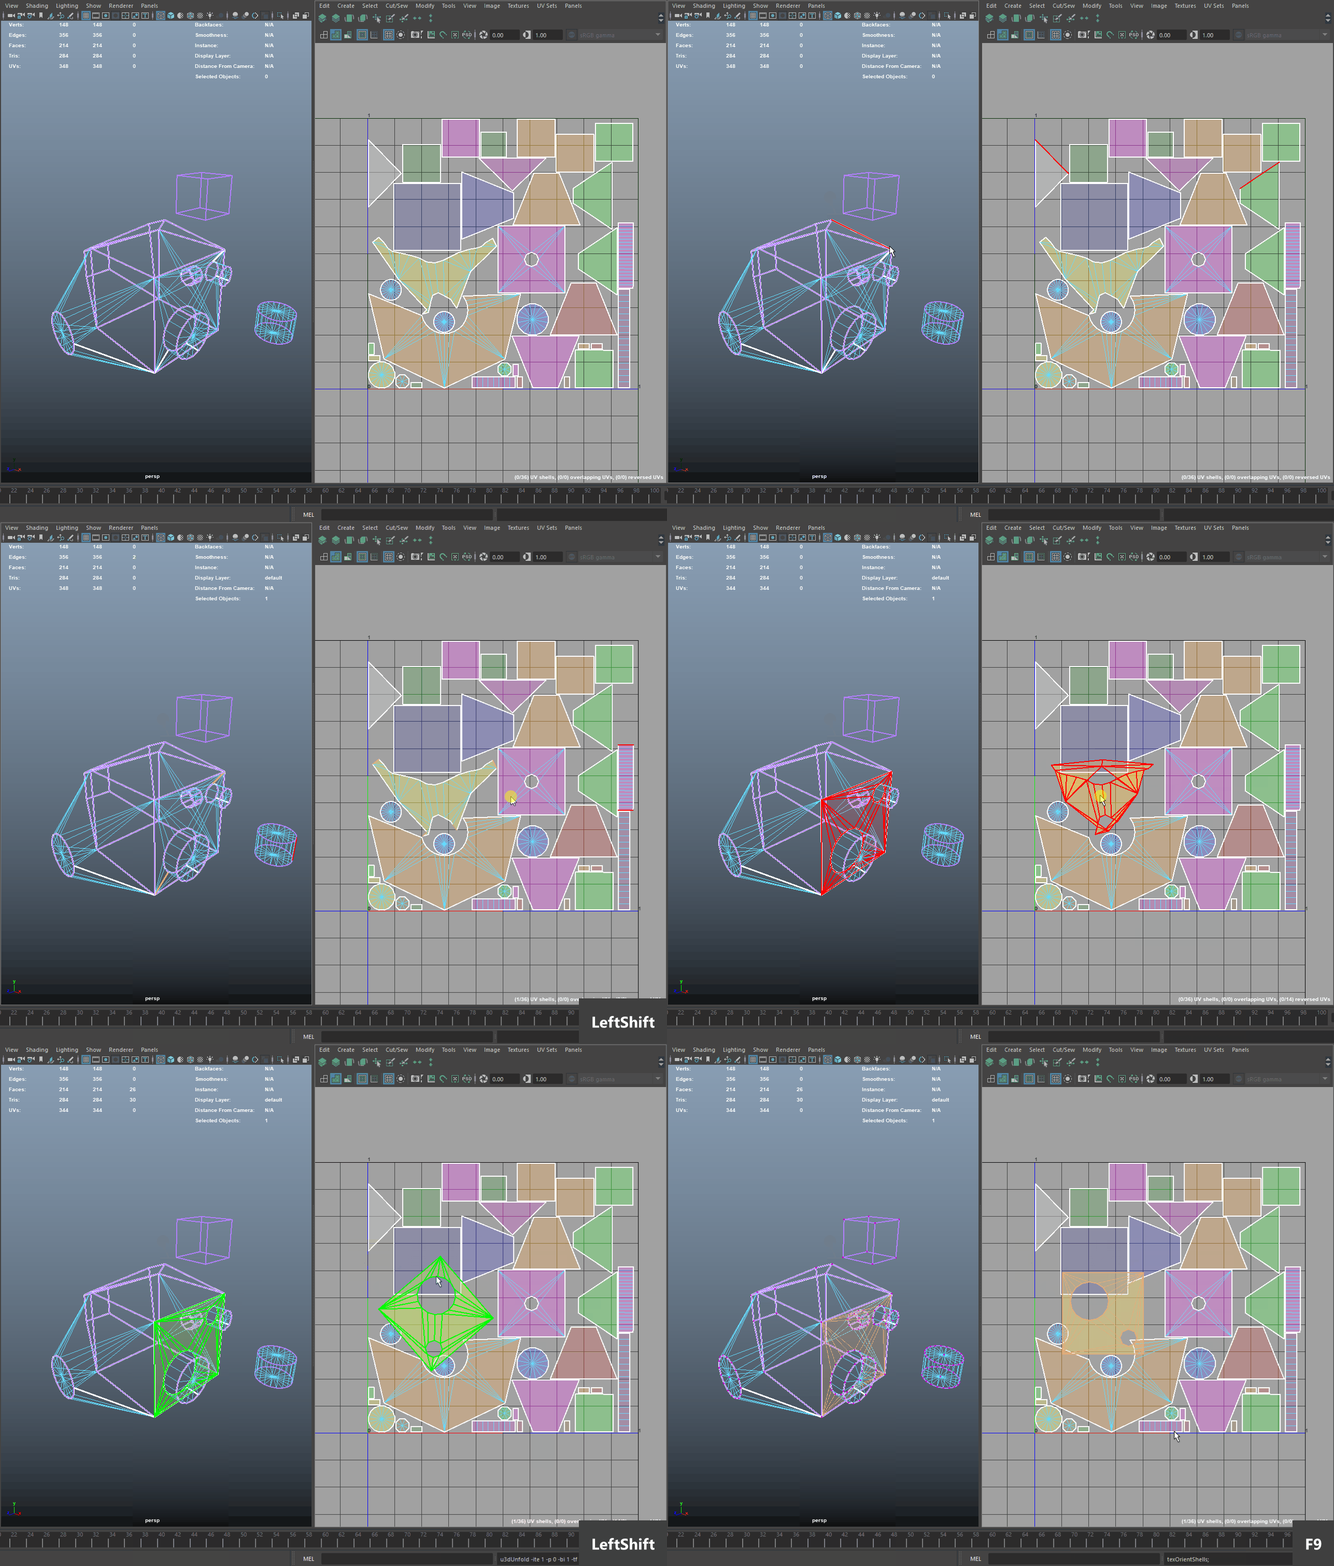
3. Since the script uses the u3dAutoSeam command to cut the UV shells and ensure a proper unwrap, the results might need some tweaking. For example, here are some resulting UV shells that will require tweaking as follows:
a. Unnecessary UV cut. Just sew it:
b. Two other UV cuts that also result in a broken UV shell. Sew these together and then Unfold and Orient the new shell:
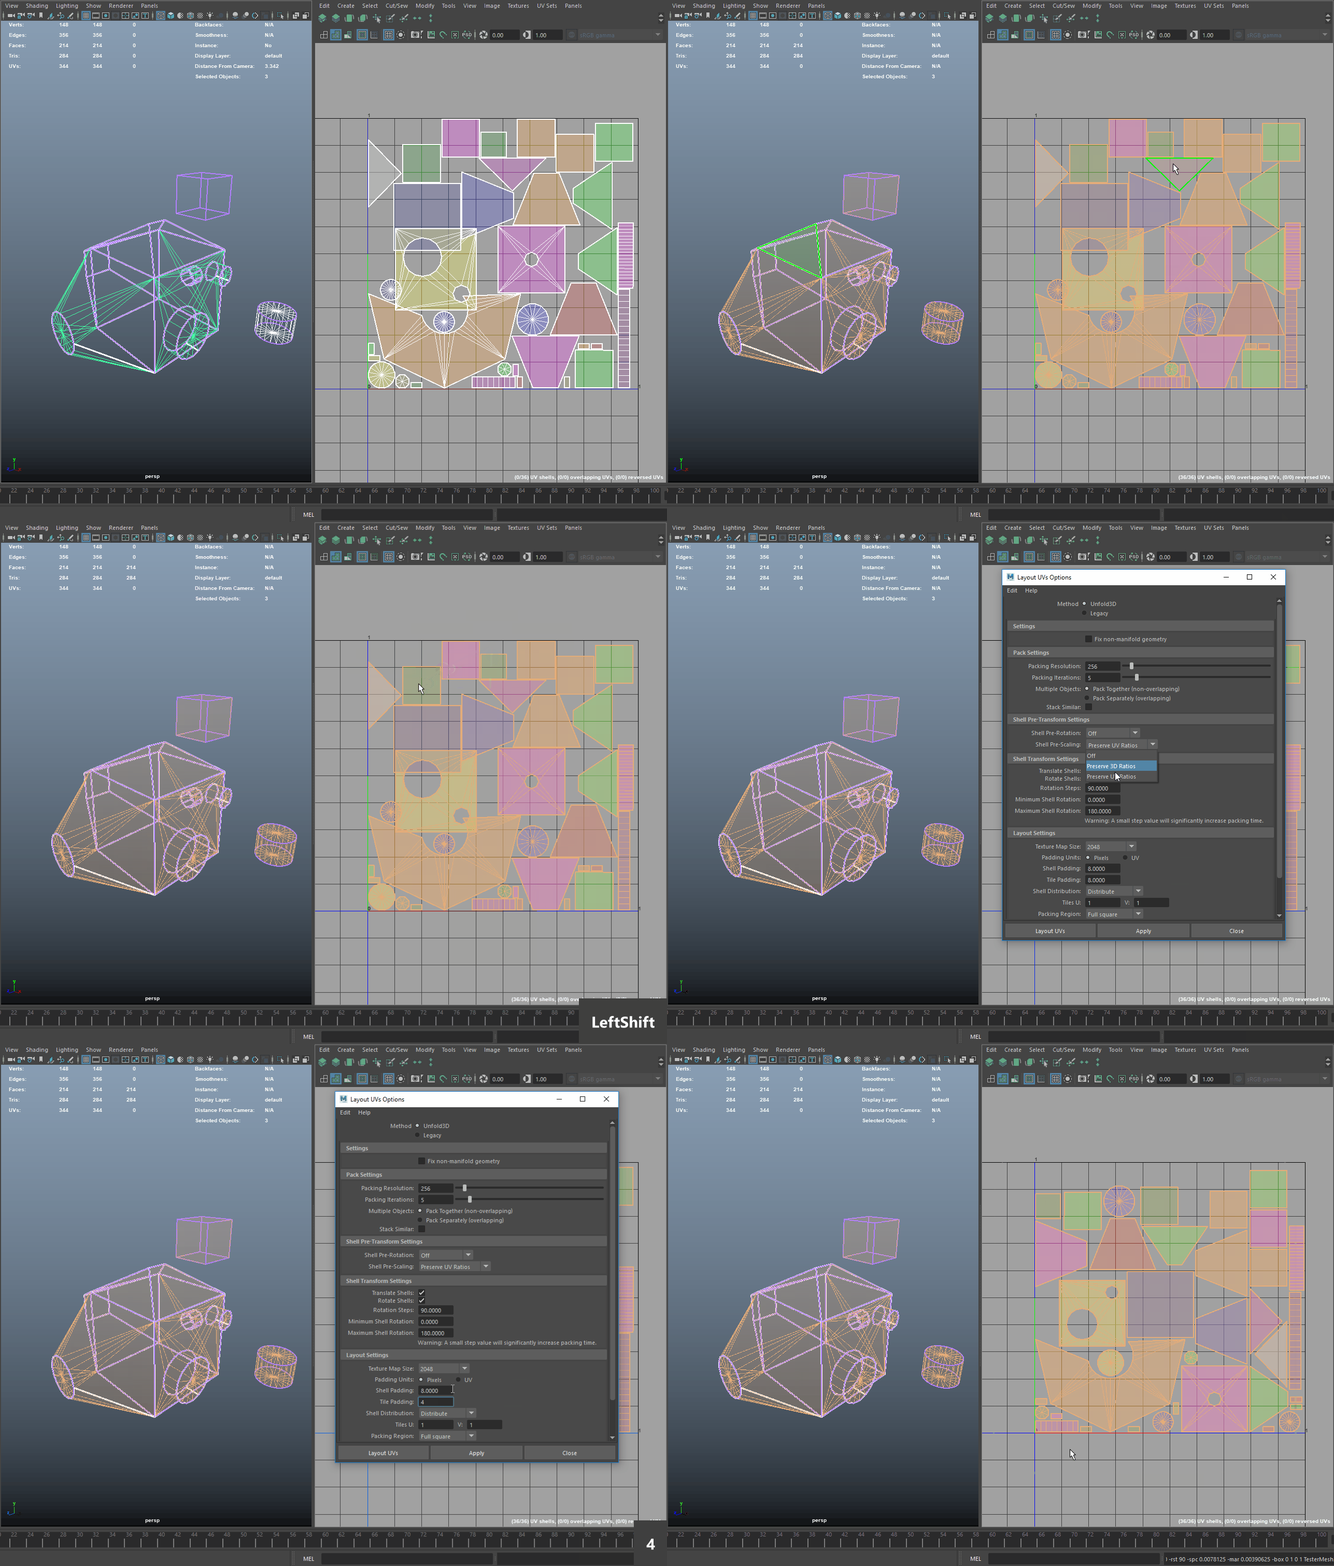
c. After fixing everything, select all objects/UV shells and re-apply the Layout UVs. Any changes you make to the Layout UV Options will be remembered next time you run vrnAutoMap:
OPTIONAL/ALTERNATIVE USAGE:
1.Custom UV cuts:
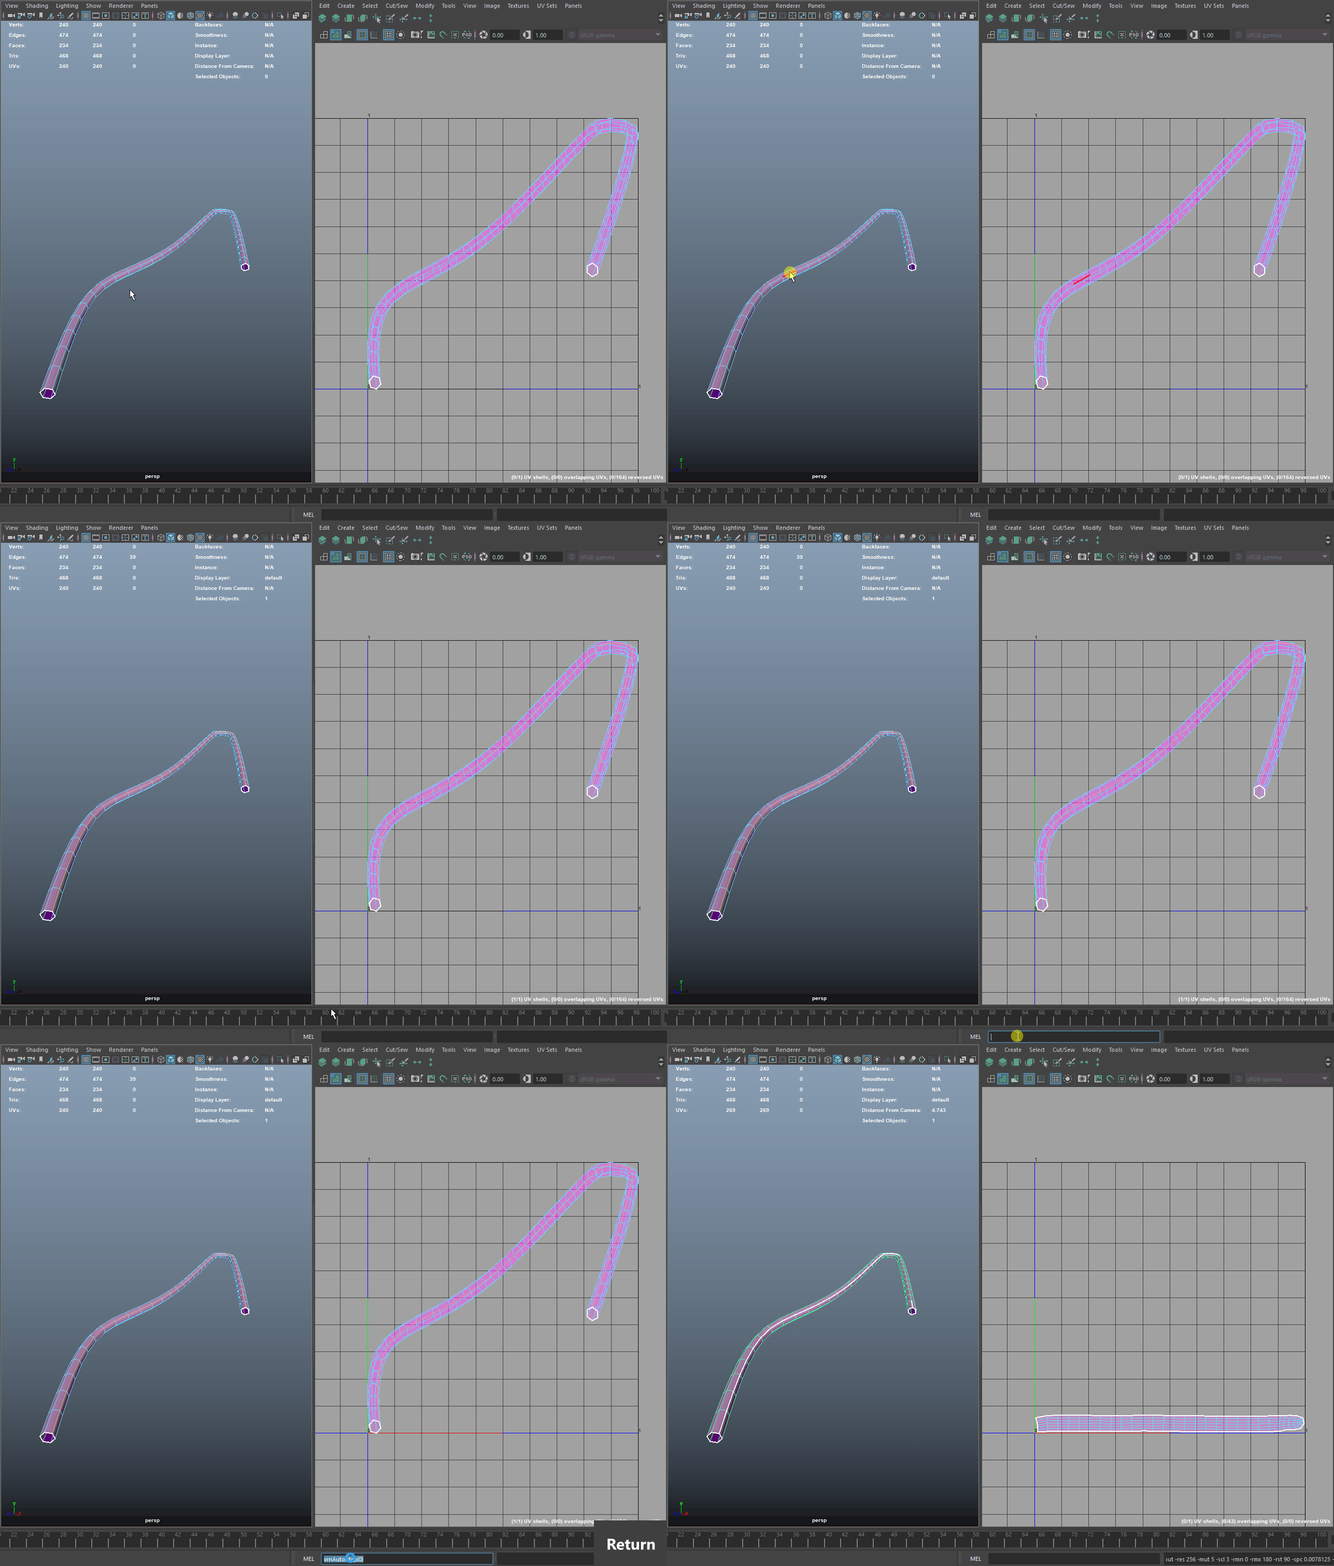
If you are not happy with the way "Auto Seam" chooses the UV cuts you can specify your own edges to be cut in UVs. To do this make sure you have the edges you would like vrnAutoMap to cut. This is very helpful when doing UVs for cylinders type meshes, for example hoses, in which case you might want to control where the cut along the cylinder goes.
2. Quick Soft/Hard edge:
If your mesh does not have proper soft/hard edges and you also want to let vrnAutoMap set them automatically, use this command:
vrnAutoMap(1,0,0)
This will open up a simple input dialogue that takes in an angle (default: 55) and applies soft/hard edges accordingly before running the UV part of the script.
CUSTOM USAGE:
The function can tweaked with these three arguments:
vrnAutoMap(x,y,z) replace x, y, z as follows:
x:First argument controls how soft/hard edges are handled.
x=0
Script will use existing soft/hard edges. $angle is ignored.
x=1
Script will add soft/hard edges by $angle from a "promptDialog". Default value is 55 degrees.
Use this if your mesh does not have soft/hard edges.
Pro Tip: After running this use the new "3D Cut and Sew UV Tool" in Maya 2018 to cut, sew and unfold
any remaining issues with your mesh. Make sure to check out the tool options to check out the specific
shortcuts for this tool!
y: Second argument controls the texel resolution of the final pack in px/Unit as available in the UV Toolkit
y=0
Script will ignore map size and will pack everything and fill the 0-1 UV space.
y<>0
Will scale all shells to desired texel density and then pack to the lower left side of the 0-1 UV space.
z: Last argument is the map size, as available in the UV Toolkit. If y=0, this is ignored.
Otherwise set as desired, preferably a power of 2.


